
 Welcome to blogging land, you have made a great decision and un-valuable investment to start your own blog and join other successful bloggers.
I assume that you have already installed WordPress and now wondering what you should do next. If you haven’t started your blog yet, you can start your own blog with our recommend web hosting company Bluehost or you can read my full guide on how to create your blog the easy and right way.
After installing WordPress Most people will be eager to go ahead to start writing amazing content but wait, there are some essential settings to complete the setup your WordPress blog just before you create the first piece of content.
If this is your first time to work with WordPress the number of settings and options available are overwhelming. You might feel lost on what you should do next. While most of the default WordPress settings are fine, there are some important settings that need to be changed to fit your blog setup scenario.
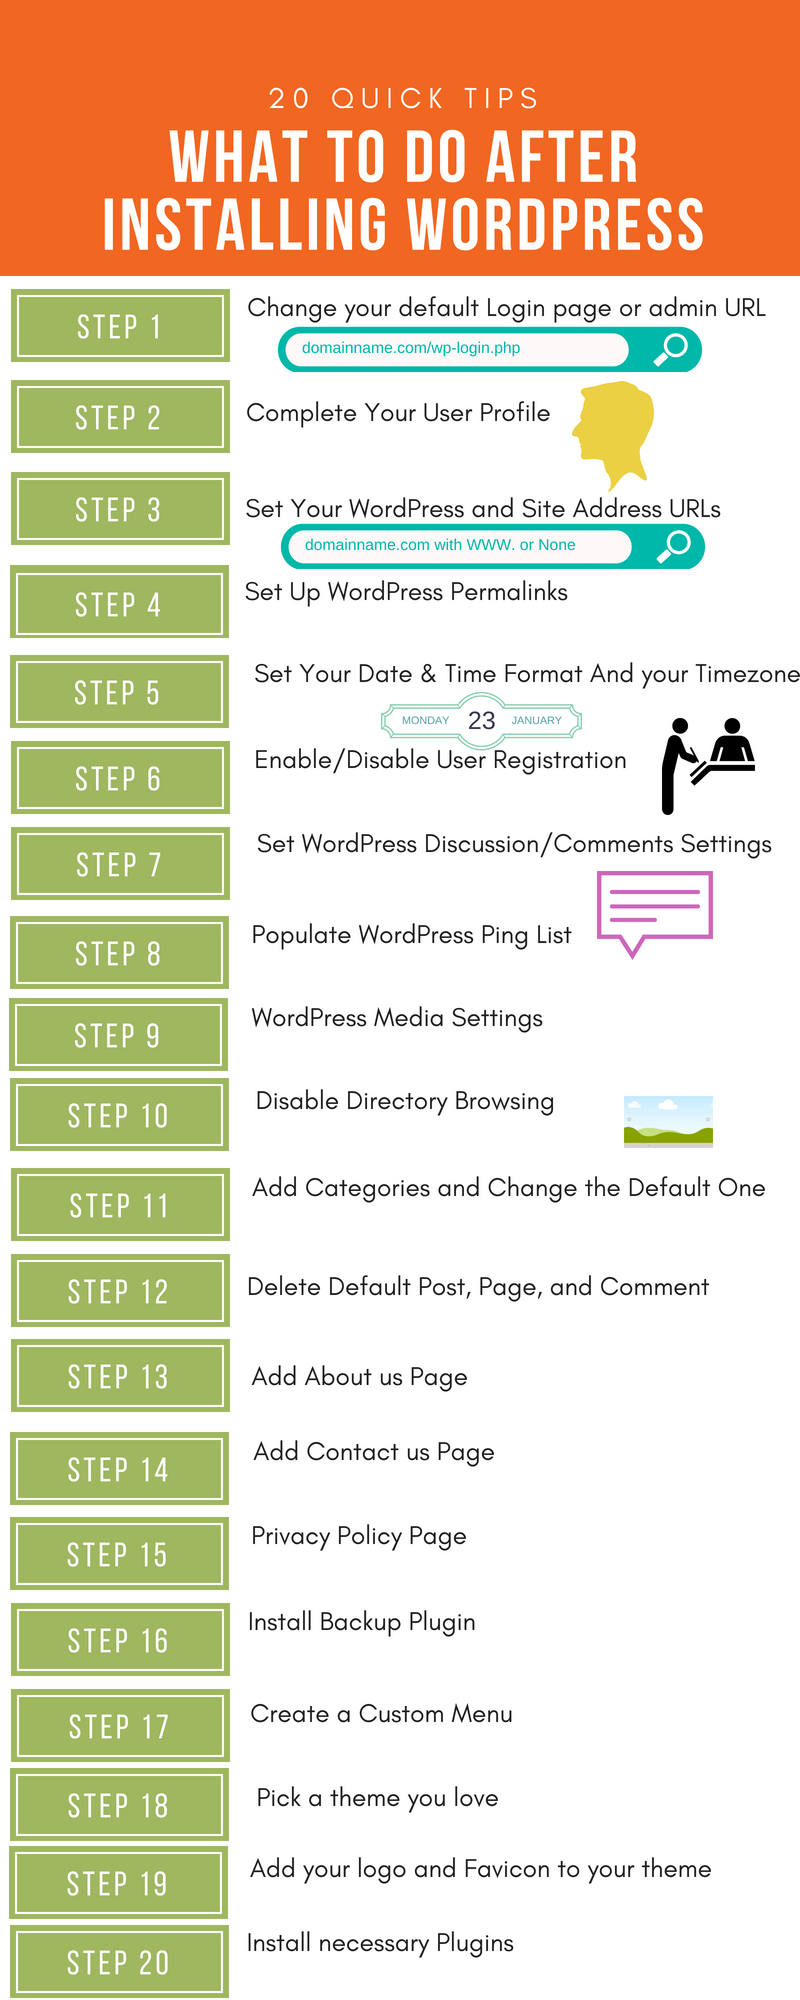
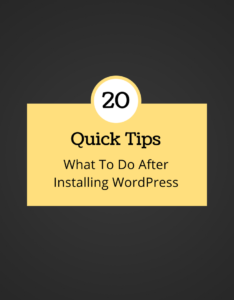
20 Essential Steps To Do After Installing WordPress
The first step was mentioned in our How to start your blog guide but I will mention it again just in case you have missed it.
1. Security: change your default login page or admin URL
It’s very important to secure your blog from hackers waiting to hack your blog and steal all your hard work. Since all WordPress websites are being installed with the default Login page URL as per the below:
Yourdomainname.com/wp-login.php
It’s very easy for a hacker to try to hack it as he already now the admin URL. All that you need to do is to change this URL to something unique that nobody knows. And there is a free plugin called WPS hide Login that will help you to do that.
When you change the admin URL to a unique one, it will be harder for hackers to hack your site because simply they can’t guess your admin URL, secondly, you will reduce the bot traffic from softwares that hackers use to hack your website.
To change your default Login page using WPS hide login plugin follow below steps:
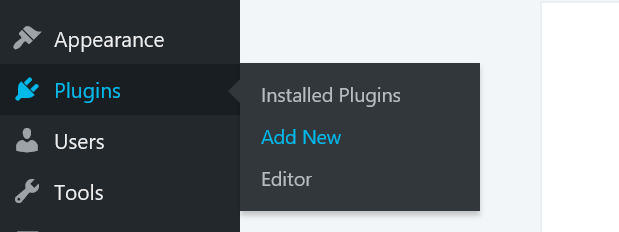
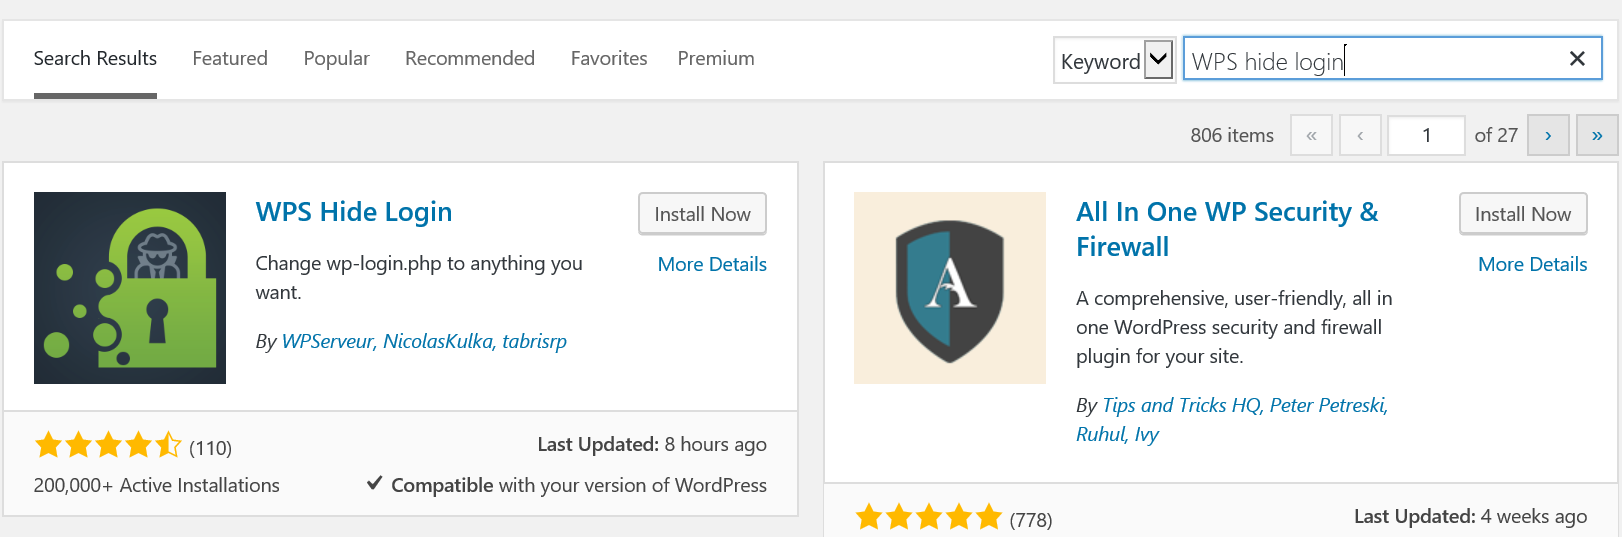
- From the left-hand sidebar, select Plugins and Click add new.

- Fill in “WPS hide login” in the search box.

- Click install Now > then activate.
- WordPress will automatically redirect you to the list of installed plugins. Look for WPS Hide Login plugin on the list and click on Settings.
- Scroll down to the end of the page tell you see Login URL. By Default it’s Yourdomainname.com/login, Again we don’t want the default as this will be the hacker second guess. Change it to something unique and click on save.


Be sure to keep a record of your new admin URL in a safe place, you don’t want to lock yourself from your own website.
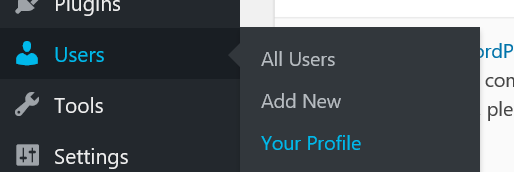
2. Complete Your User Profile
From the left-hand sidebar click on users Your profile
Fill in your user details such as:
- Your First name and Last Name
- Your Display Name
- Your Site URL
- Your Author Bio
- Add your social media accounts links.
Social media accounts links might not be available by default. It depends on the current theme Installed. Once you have chosen and installed your theme you can come back to your profile and add your social media accounts.
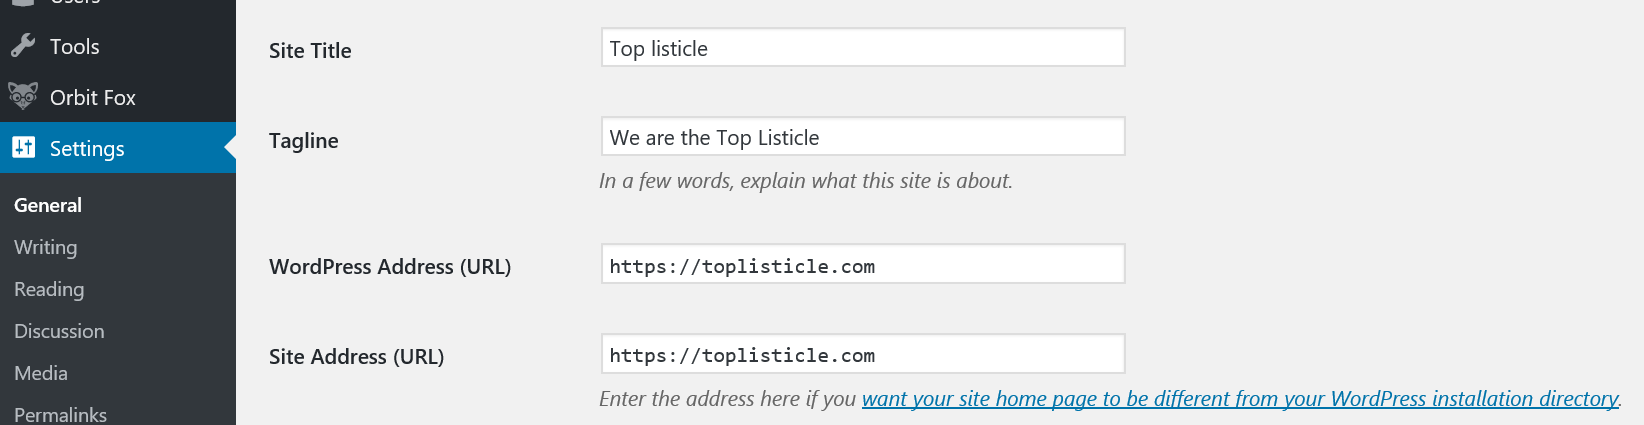
3. Set Your WordPress and Site Address URLs
Under Settings > General. Set your WordPress Address and Site Address URLs. You can choose to have www. before your domain name or none. It makes no difference.
However, it’s really important to stick to the URL you are selecting. Google will treat these two as totally different URLs.
If you have selected www or None be sure to use the same when you submit your site to search engines, when you comment on other blogs, when you are building backlinks, on your social media accounts, and everywhere else.
Double check that your site title and Tagline is as you want them to be.
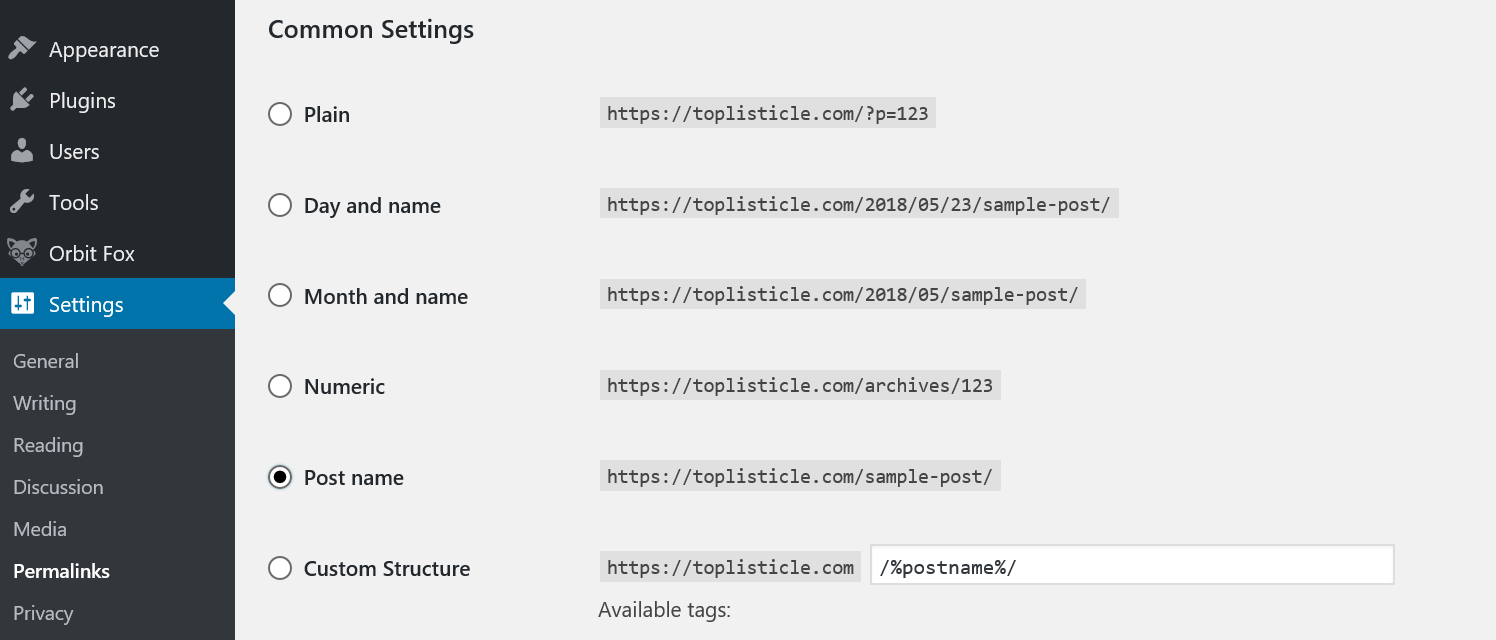
4. Set Up WordPress Permalinks
WordPress Permalinks is the structure of your Links. Each time you add a new post or page WordPress will assign a link which is used to reach to your post or page.
WordPress gives you the option to set how the link will be structured. WordPress provides you with the most common options to chose from and also the option to set a custom structure.
By default, the option is set to Day and Name. The most common setting to use is Post name as it’s more user-friendly, it’s shorter than using Day and Name and better for Search Engine Optimization.
A common practice for bloggers to include Keywords that they want to rank for in the Post title. If you choose Post name as your Permalink structure your Keywords will be included in your URL.
This helps search engines crawl your posts faster and rank them higher for your keywords.
To change your Permalinks structure, go to Settings >Permalinks and chose Post name.
5. Set Your Date & Time Format And your Timezone
Under Settings > General. Scroll down till you reach timezone. Set your Timezone and choose your data & time format.

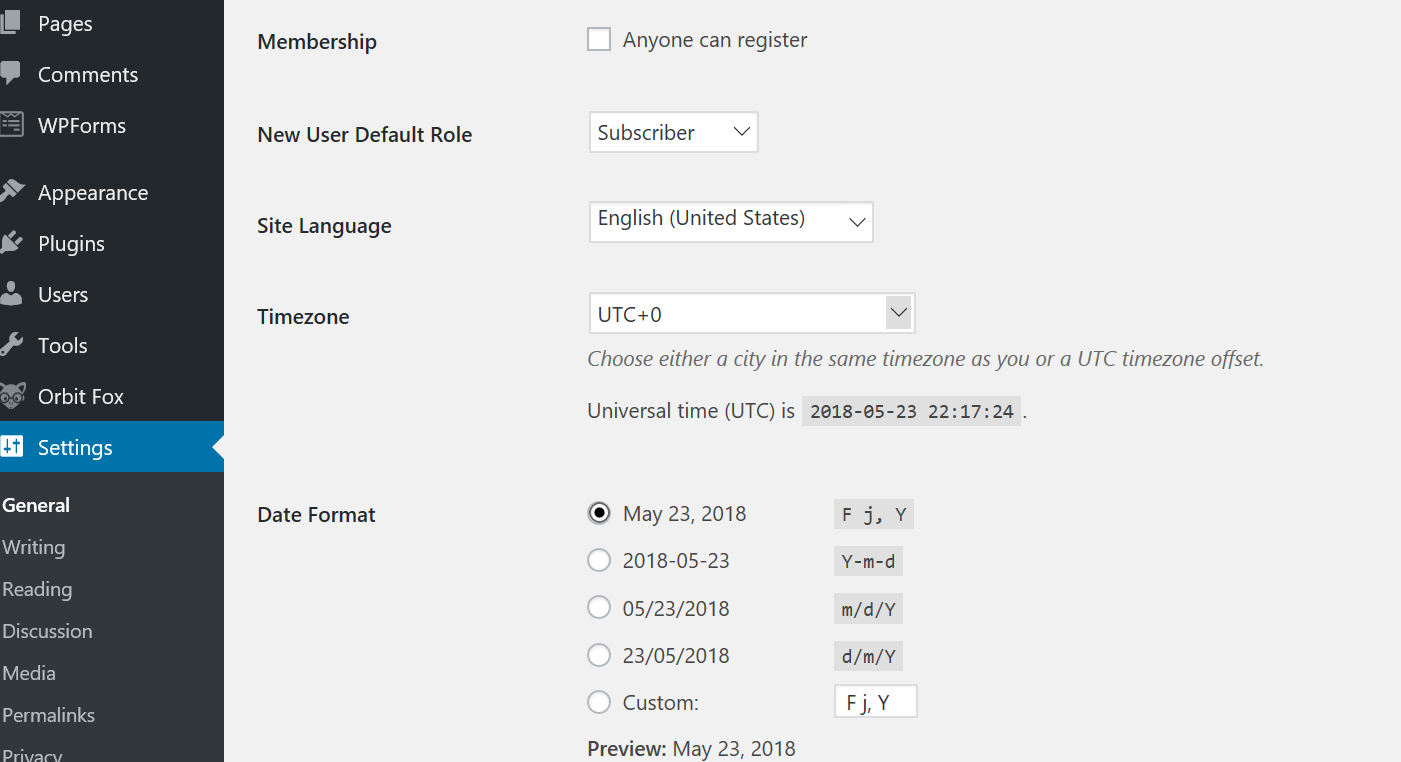
6. Enable/Disable User Registration
Under Settings > General. Scroll down till you reach Membership. By default, No One can register to your website. However, if you need to enable this setting, tick the box beside Anyone Can register and save.
By default, the user role for the newly registered user is Subscriber. Why would you allow people to register at your site?
- If you are using a comment plugin and you set it to allow only registered user to be able to comment.
- If you are running a membership blog.
- If you are running multi Author blog.
- If you allow submission of guest posts on your site by allowing people to register and to submit a draft post.
Remember that you can also add any user account manually. So if you don’t need many people to sign in to your blog, you can make a contact form and ask people to fill their details and then create accounts manually for people you approve.
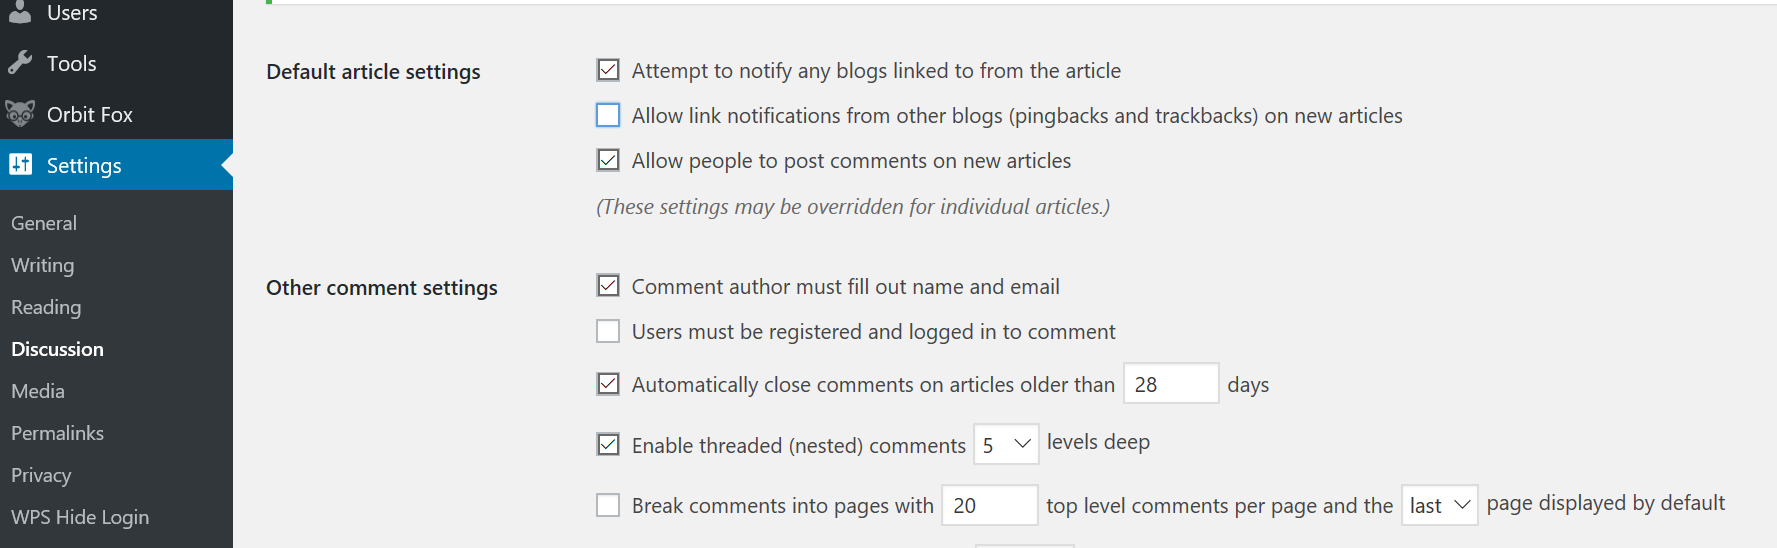
7. Set WordPress Discussion/Comments Settings
Under Settings > Discussion. You will find the comment settings there.
By default, the comment setting is set to close on articles once it has been published for 28 days. You can increase the period to more days which is recommended or you can disable it completely by unticking the box which will keep comments open.
On blogs with a lot of blog posts, traffic, and comments. Fighting spam and managing comments can become a pain. Therefore busy blogs set the option to close comments after x period of time. Most commonly after two months.
Notice that by default the option is unticked beside Users must be registered and logged in to comment. If you want to force users to be logged in, you need to tick this box and you need to make sure that Membership option is ticked in the previous step.
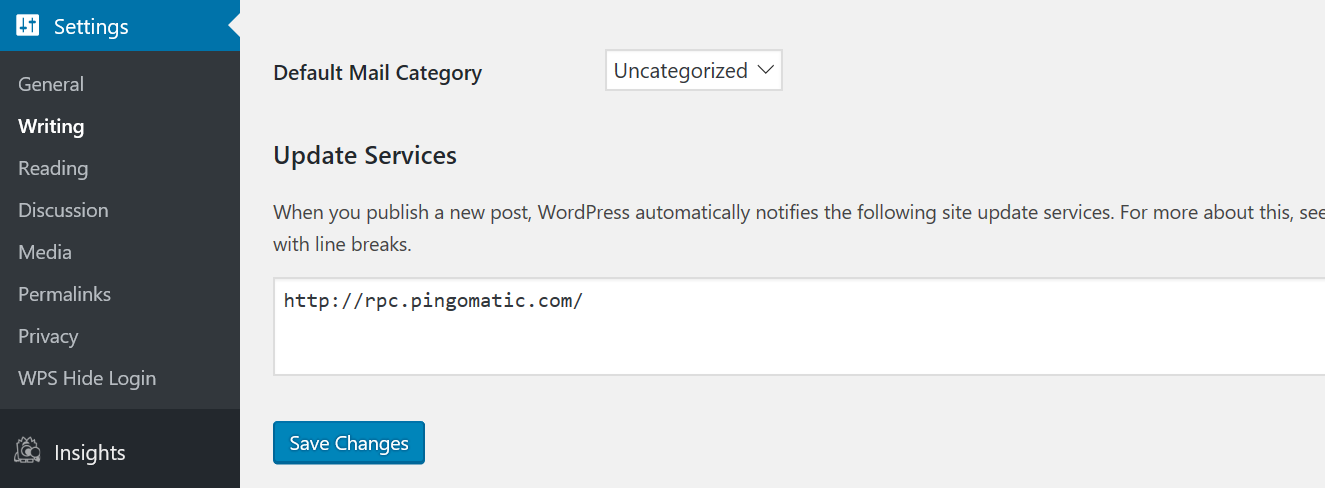
8. Populate WordPress Ping List
Under Settings > Writing. You will find a box as per below image for a list of update services site and by default, WordPress is populated with 1 update service site only.
Whenever you publish a new post or update existing posts, WordPress automatically notify the site of your list which helps search engines pick up and index your posts faster. For a list of sites that you can add, head over to Shoutmeloud blog to find a complete ping list.
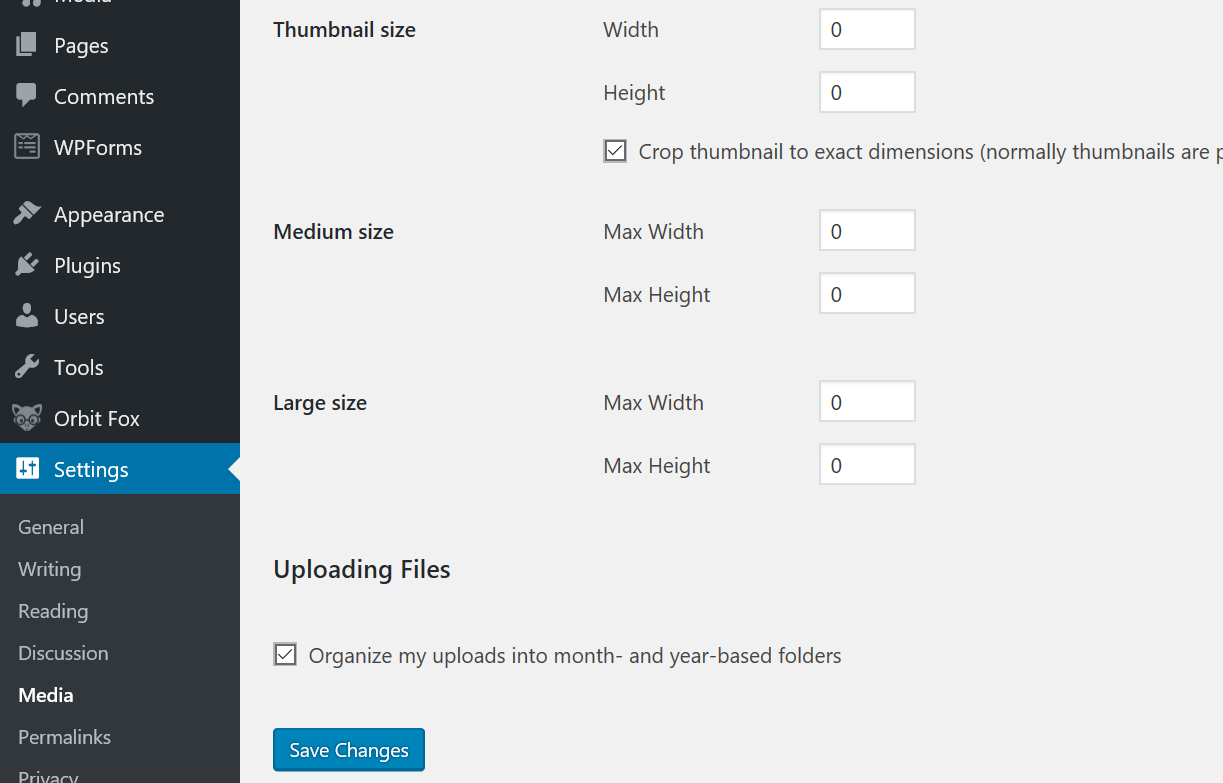
9. WordPress Media Settings
By default, WordPress sets the size for different formats of the images you upload to WordPress.
WordPress creates 3 versions of each image you add. If you have a lot of blog posts with a lot of images this can increase the number of files and storage size on your server. it can add up real quick.
Go to Settings > Media. You can change the size of each image format as you want or you can set all values to zero to disallow WordPress from creating multiple files of your image.
10. Disable Directory Browsing
WordPress blog by default has the Directory Browsing enabled. Directory browsing allows you to see folders and subfolders for your website. If Directory Browsing is enabled hackers can find a way to your blog by browsing your directory looking for a way to sneak in through a plugin or theme which you have installed.
While some web hosting companies like Bluehost disables Directory Browsing by default. Your web hosting might keep this option up to you. It’s better to be safe than to be sorry, enter the below link into your browser. Be sure to use your domain name.
https://Yourdomainname.com/wp-includes/
If you see a list of directory files then you need to disable Directory browsing. To disable directory browsing all you need is to edit your “.htaccess” file and add the below line code
Options -Indexes: Just to make sure you don’t miss things up. Take a copy of your .htaccess file before you edit it
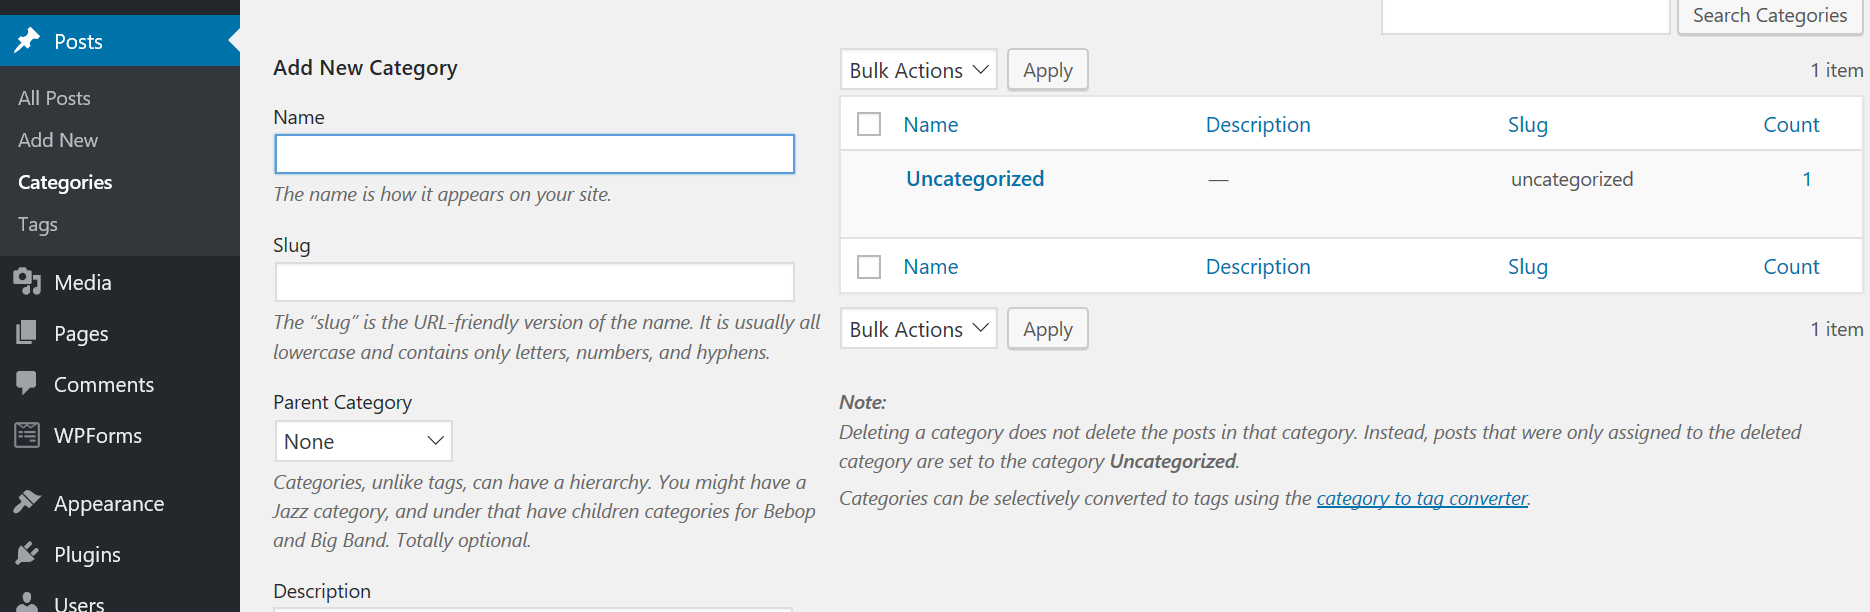
11. Add Categories and Change the Default One
Categories allow you to group posts under the same topic “Category”. By default, WordPress has 1 category which is called “Uncategorized“.
You can’t delete this default category but you can rename it to a more useful name. When you change the name be sure to change the Slug to the same name. Slug is the URL address for this category. Having Categories with your Keywords can help search engines understand your website structure better and can help you with ranking higher for your blog posts.
To help you understand how to select your categories let us look at following example, if you have a sports blog, you can add the following as your categories:
- Football or Soccer.
- Basketball.
- Volleyball.
To Add a new Category go to Posts > Categories. Simply put the name and slug (should be the same as the name).
When you add a new blog post there is a setting where you can assign your post to different categories, it’s recommended that you don’t assign your blog posts to more than 2 categories.
12. Delete Default Post, Page, and Comment
By default, WordPress have sample content like pages, posts, and comments. Delete these content.
To Delete Sample Page:
- Click on Page > All Pages. Select The sample page and click on trash.
DO NOT delete the Privacy Policy page. You will need to keep this page.
To Delete Sample Post and Sample Comment:
- Click on Post > All Posts. Select Sample post Click on trash.
When you delete the sample post, the sample comment will be deleted as well. Just to confirm click on comments and make sure no sample comment is there.
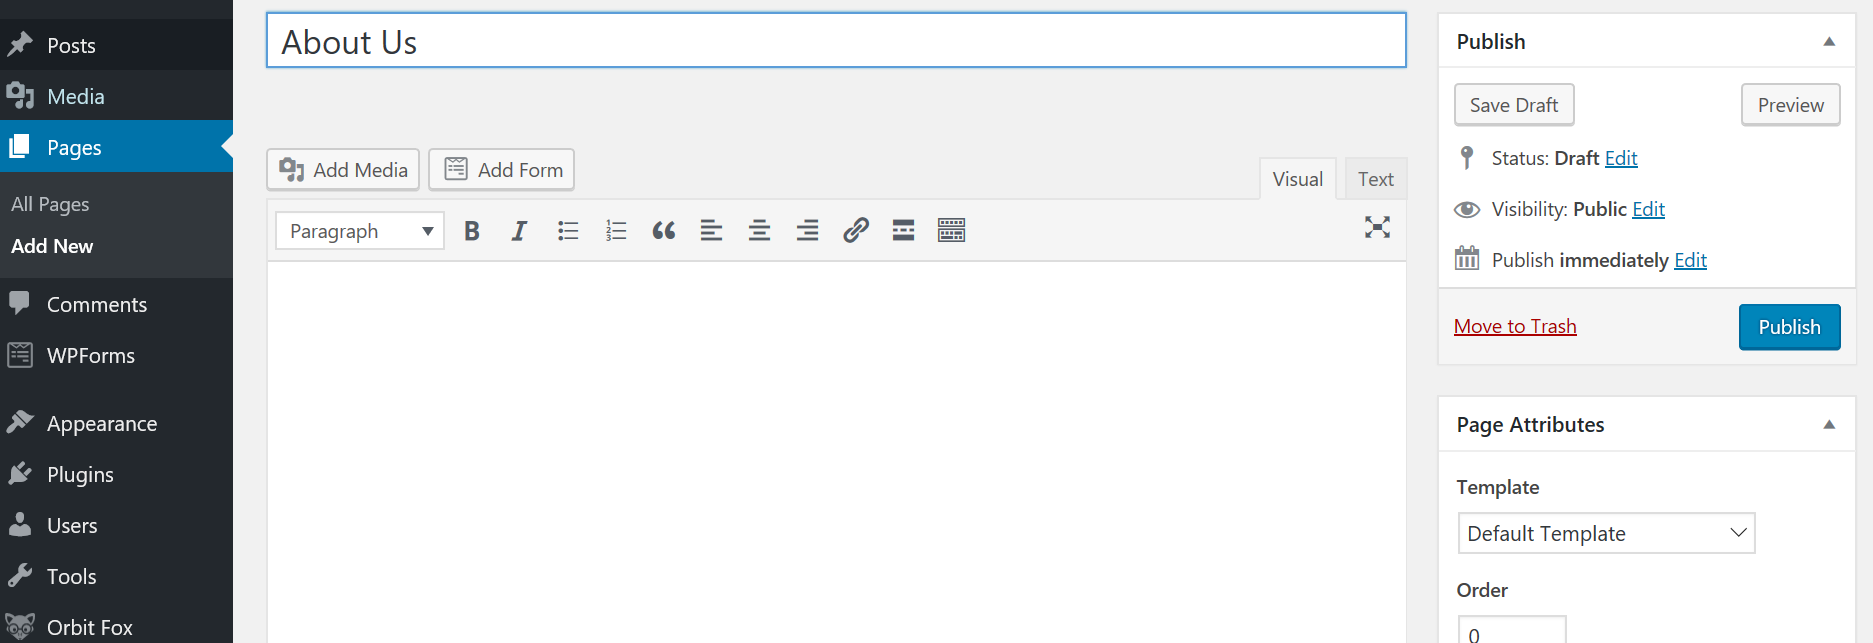
13. Add About us Page
Add About us page to your blog, it is an important page that can provide information for your blog readers about you and your blog. You can add information on why you have created this blog and what is your vision for it. Also, it can be a great way to market your blog by listing facts about your blog and the services your blog offer.
Click on Pages > Add new. Give a name to your page and add your details.
Once you are done you can click on preview to see how your page will look like. If you are satisfied click on Publish.
14. Add Contact us Page
You need to let your readers know that can contact you at any time. And you need to provide them a way to contact you by adding a contact us page. Follow the same step as in adding your About us page. You need to click on Add Form to add your form which your readers can fill in order to contact you.
For this to work, you need a Form plugin like WPforms which is already installed if you have used Bluehost to install your WordPress.
If you don’t have a form plugin install WPforms plugin or any similar plugin to be able to create and add forms to your contact us page and your blog posts if needed.
15. Add Privacy Policy Page
Privacy page is an important page to comply with the laws such as the recent GDPR. It is also a requirement to have a privacy page for advertising companies like Google Adsense and Affiliate programs such as Amazon.
If you have installed The latest WordPress 4.9.6 version it will come with a Privacy page. The privacy page is already populated with most of the sections that you need to comply with. But not all the sections have the required text.
If you copy our privacy policy, be sure to change our website name and URL with your website name and URL. You can add additional sections if required.
16. Install Backup Plugin
Having a backup of your WordPress blog is crucial to your business. You need to make sure that there is a scheduled Backup of your blog on daily basis not just once every 1 month. Also, you need to make sure that you manually take a backup before you do any changes to your WordPress blog design or features.
Sites could break at any time. An outdated theme or plugin could break your website, or even updating your plugin or theme to the latest version could also break your plugin. Having a continuous backup will make sure that you can restore your latest backed up file that was taken before the crash happen.
Not only you should have these backups on your web hosting server, but also on your personal computers. You might run into issues with your web hosting company. Your web hosting company might run into problems themselves.
Keeping a copy of your latest backup file on your personal computer can save you a lot of trouble trying to restore your blog on the same web host or a different web host. Some hosts, like Bluehost, have a number of backup options such as CodeGuard Backups basic subscription which is basically a backend backup software that regularly backs up and is a ‘1 click’ restore.
There is no software to install, nor any integration. All you need to do is to select the time you want for automatically backing up my blog on daily basis. Then you can restore the latest backup file or you can restore a specific backup file based on the date it was taken. All this from within Bluehost’s Cpanel account.
CodeGaurd Basic plan supports only automatic backup. To be able to have on demand or manual backup you need to upgrade to Pro account. If your web hosting company doesn’t offer you with automatic backup software, then you need to install a plugin that can provide you with this functionality. A Free plugin that I do recommend is BackUpWordPress. Install and Activate this plugin.
BackupWordPress Features:
- You can use it to set an automatic backup schedule by setting frequency and time.
- You can have multiple backup schedules
- you can also take manual backups.
- You can select backup Database, Files and Database & files. You can also set it to exclude some files.
- Set the number of backup files to be saved on the server
- Set Email notification, to be notified when a backup is done. If the backup file size is less than 10MB, or you can download the backup files from the plugin setting page.
- No restore option. You can’t use the plugin to automatically restore your site from a backup file.
17. Create a Custom Menu
Now that you have added your pages and defined your categories, it’s recommended to create the Main Menu and a Footer Menu to make navigation through your blog much easier.
Depending on your theme there might be an additional menu location for displaying social media account which might be called Social menu. It’s a common practice to display categories in your Main Menu and to display your pages in the footer menu. People don’t tend to visit ‘pages’ very often (eg About, Privacy etc).
This is very easy to do. Go to Appearance > Menus.
18. Pick a theme you love
WordPress themes create a unique look and feel for your blog. It makes it easier for you to adjust the design of your blog without having to know any design skills or the need to write any single line of code. There are over 3,000 Free themes and hundreds of paid or what is called premium themes.
Since each blog is unique in its nature, unique in its design requirement and goals, there is no theme which I can recommend to you that will match all of different people needs. You need to look for the best theme for your blog.
However, I do recommend to go with a premium theme if you afford it, as premium themes provide more professional designs, more optimized theme for speed and search engines. Premium themes provide tons of additional features which otherwise you might need a handful number of plugins to have the same functionality or you might need to add additional complex code.
Once you install your theme, Delete the unnecessary themes. Keep just one additional theme in case you need to test so features or in case something happened with your original theme. I prefer to keep one of WordPress defaults (Twenty Nineteen) for trouble shooting.
It is worth to note that some themes will need to recommend plugins to provide essential functionality so be sure to install them if you see a notification from your theme page.
19. Add your logo and Favicon to your theme
Having a professional designed Logo for your blog will make your site looks more professional and will increase your brand awareness. If you don’t have a Logo for your blog yet check this post on the 21 Free and Paid Logo Makers to create a stunning Logo for your blog.
Favicon or “site icon” is a small version of your Logo that is visible on the browser tab, bookmark tabs, and WordPress mobile apps. The use of Favicon is to let you identify which website is open in which browser tab when are having many tabs opened. There are many Favicon sizes and formats for different uses. You can learn more about them and create your own Favicon using RealFaviconGenerator Website.
If you have created your Logo & Favicon, and in order to upload it, go to Appearance > Themes > Select your theme and click Customize > Site identity > Select upload your logo to upload your logo and Select Site icon to upload your Favicon.
Premium themes will provide you the option to easily upload your Logo and themes from Theme settings page.
20. Install necessary plugins and delete unnecessary plugins
Plugins are additional precoded software that installs on top of WordPress to extend its functionality. With Over 45,000 Free Plugins and maybe thousands of Paid plugins, you will find a plugin for anything you might think of.
We would love to add all the plugins and to have all the features whether we need them or not. While this seems what everybody would want to do, you shouldn’t do it! Why? Because every Plugin you add to WordPress will increase the load time of your blog.
While some of the plugins are very light and add very few milliseconds, some extensive plugins, not well written or well-coded plugins can have hundreds of milliseconds of additional delays. It seems acceptable to have milliseconds of delays for a single plugin but having many plugins can really add up huge delay very quick.
Your blog load speed is one of the important success factors for Search engine optimization, getting more traffics and being able to make money online. So When it comes to plugins install and activate only the plugins that you need. Say NO to plugins that you might need or would be nice to have.
If you stopped using a Plugin, deactivate it and delete it.
Here are some plugins that I do recommend. Those are must have in their respective use type. If you are using any other plugin that provides the same functionality then don’t install these Plugins.
- Fight Spam
We all hate spam, and as your blog traffic increase, you will get more and more spam. In order to make it easier to fight spam install Akismet Anti-Spam which will automatically detect spam comments.
- SEO
Next, you need a plugin to help you with search engine optimization. Two of the top SEO plugins are SEO by Yoast and All-In-One SEO. Both provide very similar functionality. Such as the ability to generate page titles and descriptions and XML sitemaps which saves you from installing another plugin for generating your sitemap.
Both plugins have also SEO the capability of selecting a default image, title and description for when your post is being shared on Social media websites. There are also new competitors on the market.
- WordPress Security
Next comes the security of your blog. You need to make sure that your blog is secured against all threats install Sucuri Security Plugin.
- Image Optimization and Video Optimizations
When you have a lot of images and videos in your blog posts, it is important to make sure that you optimize it to make your post load faster. For image optimization use EWWW Image Optimizer plugin. For video optimization use WP YouTube Lyte plugin.
- Caching plugin
Another important plugin to have to make your website load much faster is Cashing Plugin. The most famous plugins are W3 Total Cache or WP Super Cache.
Remember, make sure to Uninstall any unnecessary plugin you have. For Example, WordPress install Hello Dolly plugin which doesn’t have any value for your blog so deactivate it and delete it.
Final Takeaway
Adjusting your blog theme design and your blog settings is an ongoing process. But with these essential 20 steps, you are ready to go. Start creating valuable posts to amaze your readers.